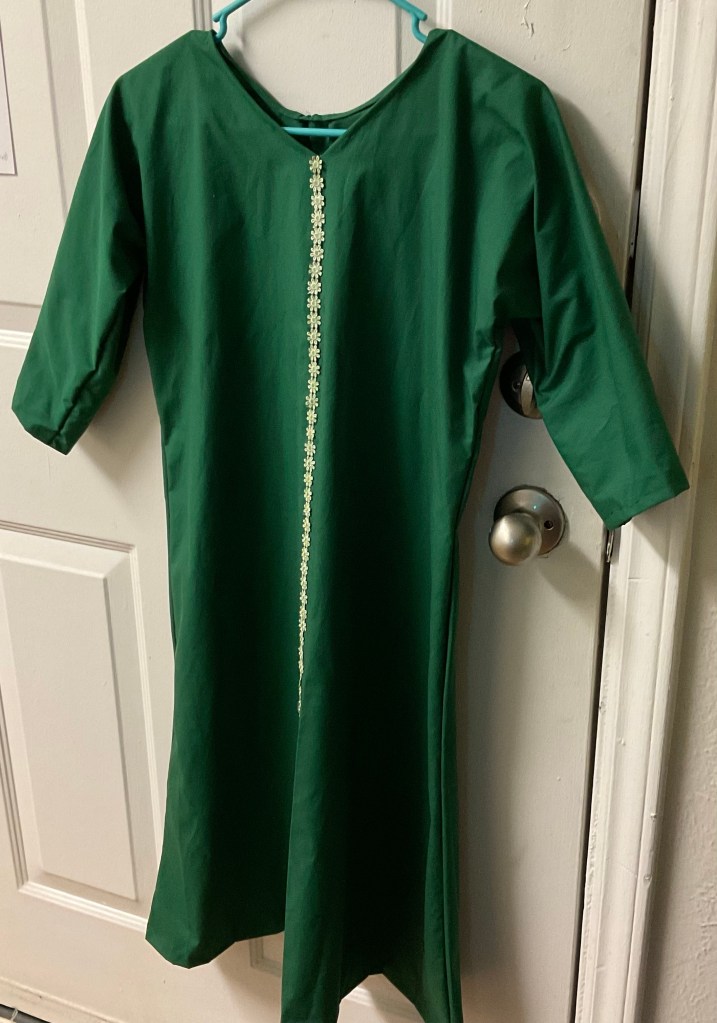
Right out of the gate: Why do many Wiccans wear robes? Some Wiccans prefer to do ritual nude or skyclad. However there are some Wiccans who, out of comfort prefer to be clothed. That is OK. Comfort is an important factor when doing ritual or magick. If one wants to wear clothing, nothing that binds or restricts energies is desirable. Robes are designed to fit loosely, and that works well. In a coven robes act a uniform. So robes are the clothing of choice for many Wiccans.
Why would you want to make a robe over purchasing one? Making a robe is generally less expensive than purchasing one. Many of the robes found online are more like costumes and tear easily. You can make many decisions about your robe: style, color, feel, texture and even decorations like trim and embroidery can make it yours. You can wear it with pride. These are some reasons to make a robe.
Are you still not sure about making a robe? A robe is an easy garment to cut out and is not complicated to stitch. Using a sewing machine is great. Sewing by hand is doable but will take some time. You do not need to run out to get that sewing machine until you know that you really will be using it on a regular basis. In fact, you can make the robe without stitching by using permanent fusible web tape, an iron and an ironing board! The Coven of Midnight has instructions on how to do this. See Suggested Investigation below.
Let us start with the purchase of fabric. Because it is easy to sew, cotton is suggested for those who are beginning to sew. Cotton is breathable and cool for warm days outside. The fabric you choose is important. Those velvety robes that look so awesome can get hot. Most Wiccans do not wear anything under the robes, and for that reason wool which can get itchy is not a great idea for a robe. A solid color is suggested, and the choice is yours unless you are practicing with a coven. A lot of people choose black and others choose white. Colors may be chosen to reflect the season during which it will be worn. Sometimes people choose a color because it reflects who they are. Any color is acceptable. If you are using trim to decorate it, purchase that while you are at the store purchasing your fabric so you can match the colors well. Do not forget the thread. The average person will need about 3 yards of fabric. Get more if you are big or tall. A very petite person can get away with a width of 44”. But most people will need a higher measurement. Before you shop, know the measurement from your wrist to your other wrist. The width of the fabric needs to be larger by at least 2” than the measurement from wrist to wrist. Find fabric that you think you will enjoy wearing!
For those who are good with a needle and want to use a pattern, there are some for robes on the market. To find one at your local fabric store look under “costumes”. Then look under the subheadings “historical” and “Renaissance”. You should be able to find one you like. Note that I will be showing you how to make a robe with a loose fitting T-shirt as a pattern. I will be showing you how to make a “T” robe. It does not billow like some robes can. Some robes that flow a lot can knock things over and swish through candle flames. Dangerous!
Now that you have what you need for the robe, wash your fabric due to possible shrinkage. Do not skip this step! Before you go further with the fabric and this is your first time with such a project, get a rectangular piece of paper like printer paper (and several more if needed) and do this exercise. Fold the piece of paper in half lengthwise then fold it in half widthwise. Draw the following design on the piece of paper. This is the design you will use to cut out your robe. Note that the neck hole goes where the two folds of the paper intersect. See picture below.
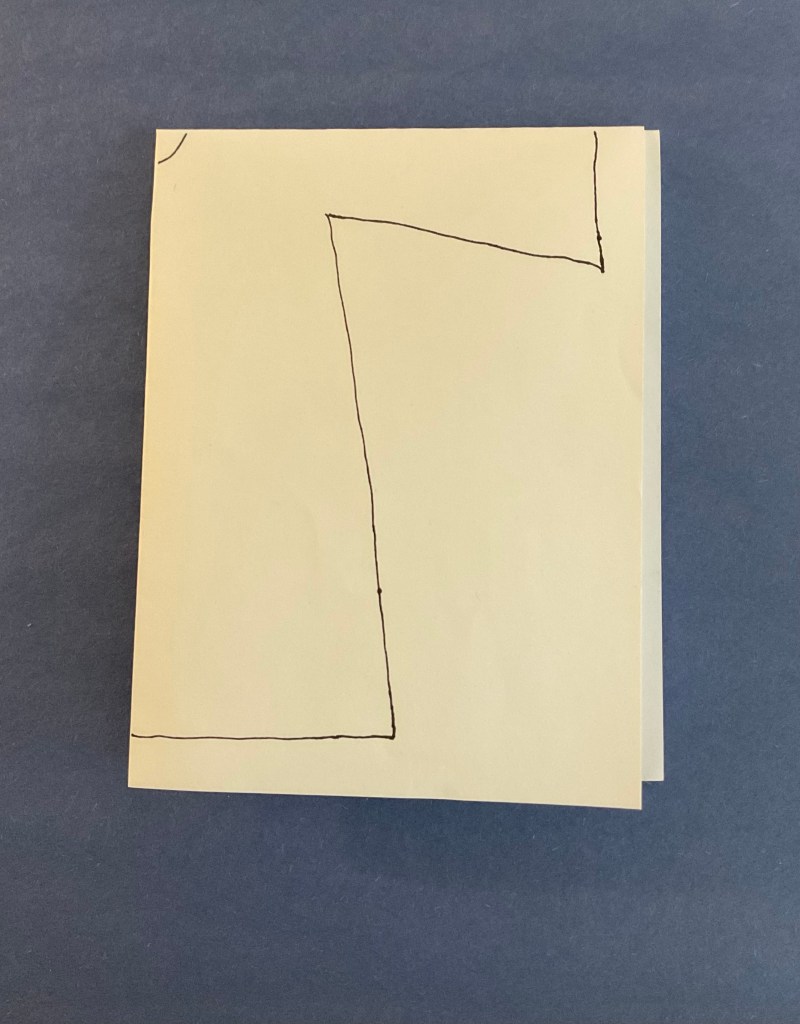
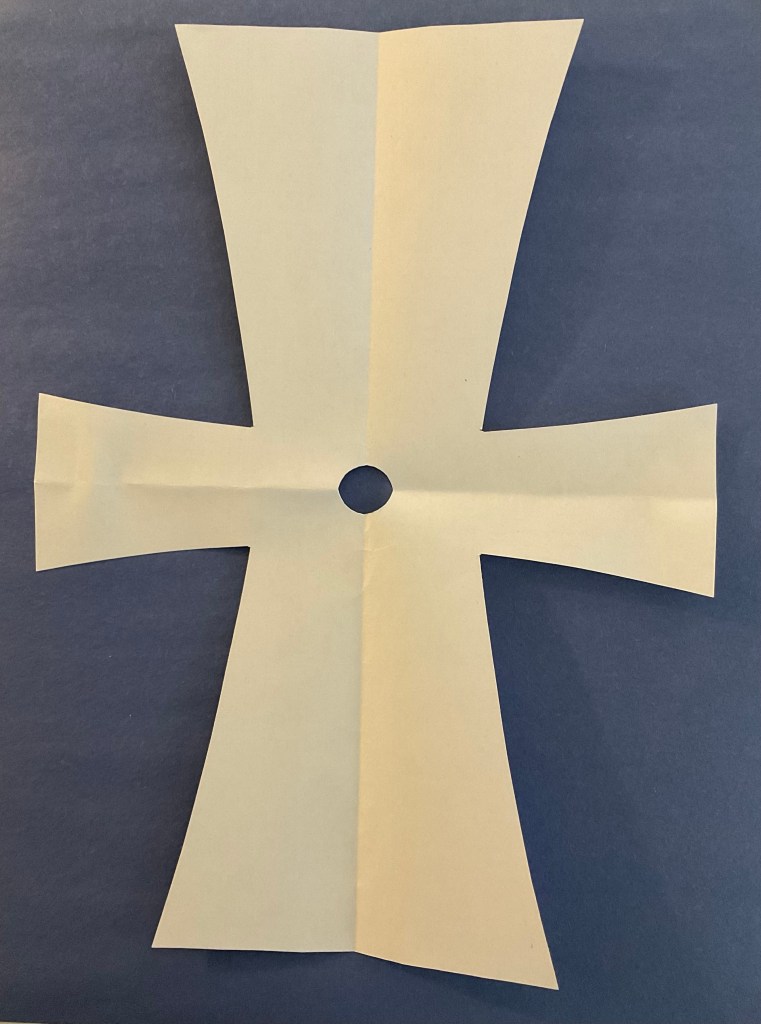
Now cut the design out, unfold and it should look like this. See picture below.
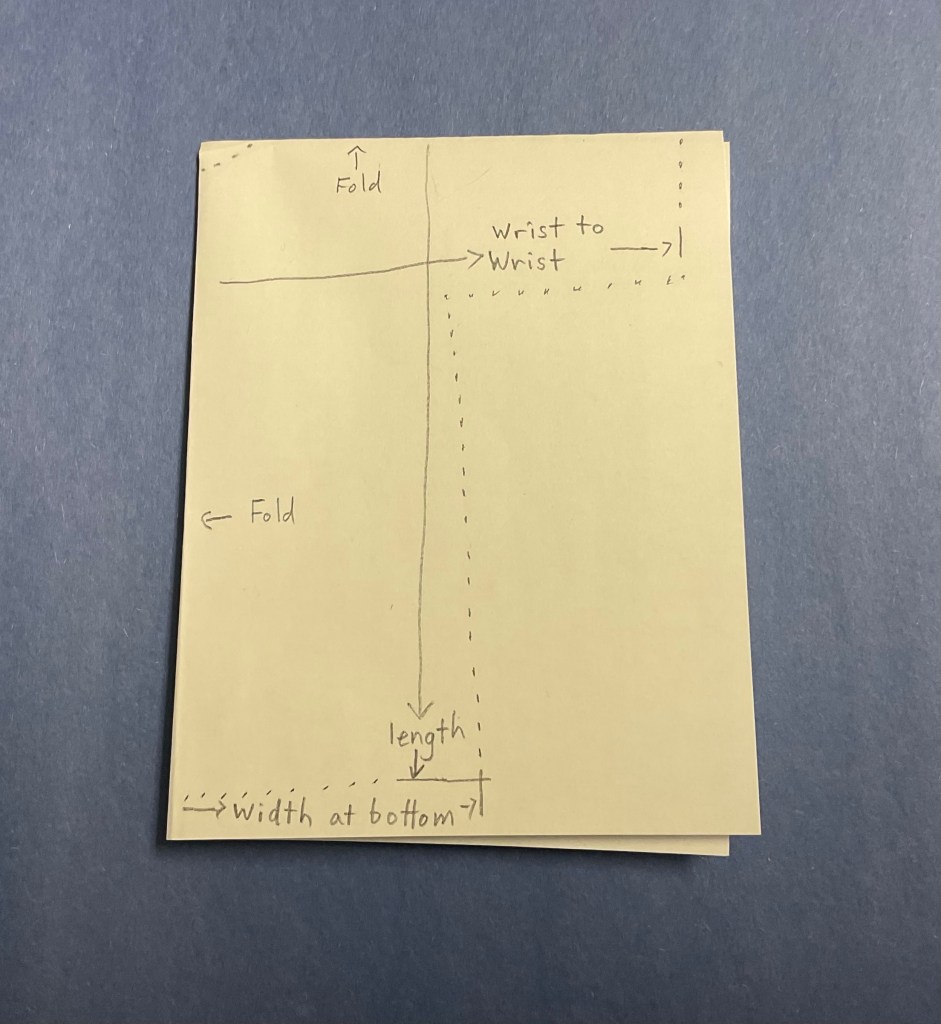
If you messed up, try again with another piece of paper. Do not be hard on yourself! This is your opportunity to learn without messing up your fabric. I would like to talk about the seam allowance and hem line. Seam allowance is where you will be sewing two pieces of fabric together. The seam allowance will be about an inch, therefore, when you trace the T-shirt, you will be drawing about an inch from the T-shirt. You will also need to consider an inch for the hemline on the bottom of the robe for each of the and the sleeves. More measuring. Measure from the nape of your neck to your ankles Add 1” for the hemline. I like to add an inch or two more to play with. This will be the length of your robe. Add 1” to the wrist measurement for the hem. I stood in a wide stance and measured from the outside of my ankle to outside of my other ankle. This is the widest stance that I wanted for my robe to be able to accommodate, That is how wide I want my robe at the bottom. Divide this measurement in half and add 1”. I suggest measuring your stance like this. But you decide on your own needs and adjust.
Fold your fabric in half lengthwise then widthwise like in the exercise. When marking measurements on the cloth, measure from a folds as shown in the picture. The dots show the design for the robe.
Get a loose fitting T-shirt that you wear. Have the following handy: your fabric, measuring tape, a good pair of scissors for fabric, tailor’s chalk and your measurements. Fold your T-shirt in half. Follow the instructions on the video.
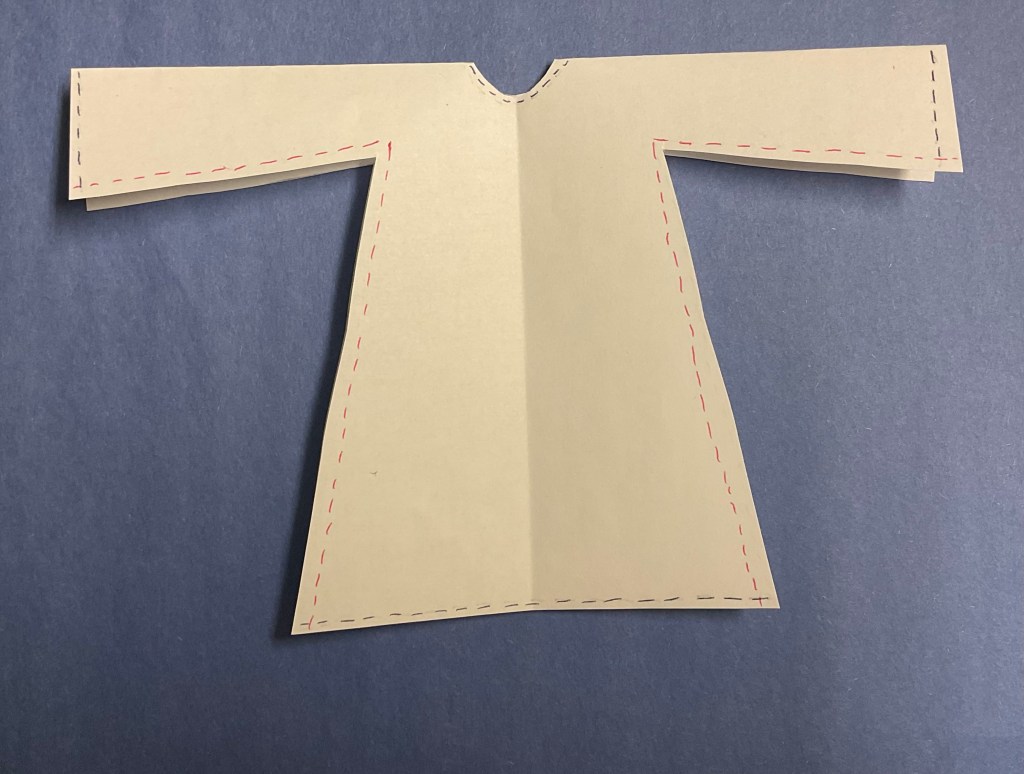
Now that you have your piece cut out, it is time to start stitching or ironing with the permanent fusible web tape as the case may be. You will use a simple running stitch for everything. On the red dashed line you will sew two pieces of fabric together. On the black dashed lines is where you will hem. Do the hems last. See picture.
Before you start hemming, try the robe on and pin it where you want it hemmed on the bottom of the robe and the sleeves. This is the time to get the neck hole the way you want it. Next is to personalize the robe. There are no hard and fast rules about how to do this. You can put a piece of trim on the edges of the sleeves or down the middle of the robe. You can embroider it or glue jewels on. It is up to you. If you want to use fabric glue glue for trim, jewels or other decorations, test it on a piece of the fabric you cut off when cut out the robe. You may not like the look if there are any stray marks from the glue. You now have a finished robe to wear. And you made it yourself!
Enjoy the process of making a robe yourself!
I will continue to post on Wednesdays.
Auburn Greene
Suggested Investigation:
Buckland, Raymond, Buckland’s Complete Book of Witchcraft, Llewellyn, 2004.
Lewis-Highcorrell, Donald, Rev., Witch School First Degree, Lessons in the Correllian Tradition, Llewellyn, 2021.
https://coven-of-midnight.wiki dot.com/making-a-ritual-robe
https://www.servantsofthelight.org/knowledge/making-a-robe/
Wigington, Patti, “Make a Ritual Robe.” Learn Religions, August 26, 2020, learnreligions.com/make-a-ritual-robe-2562742.